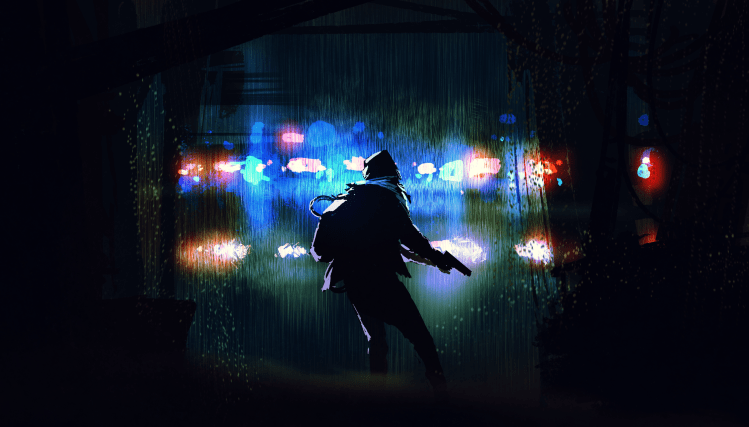
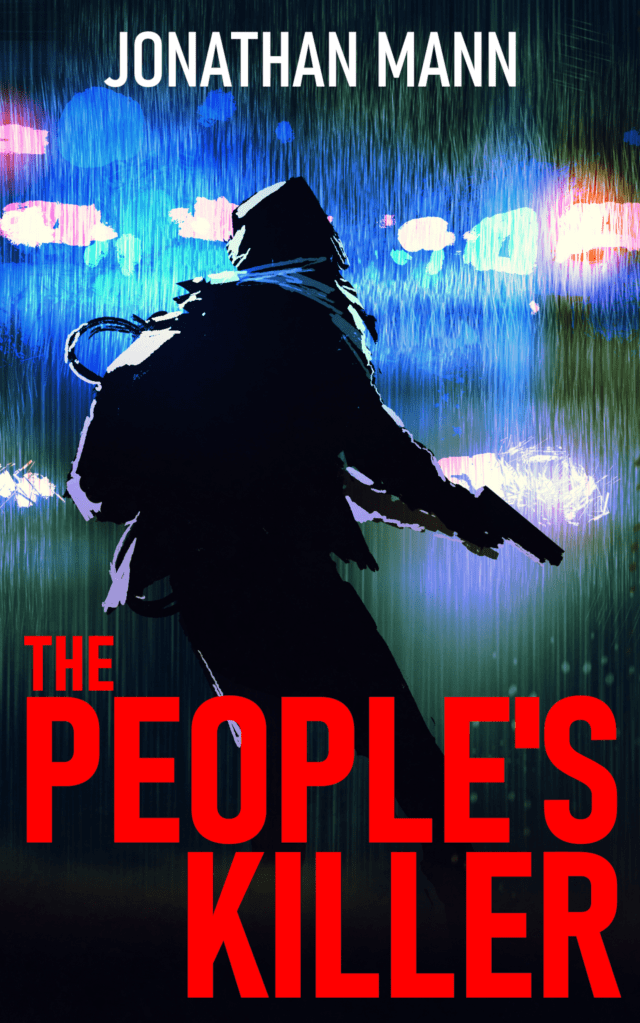
First things first: the original art for the cover of The People’s Killer, which I’ll be using as an example, is licensed to me from: Tithi Luadthong/ShutterStock.com
Note that this is less the steps you should take, and more a short summary of my particular process.
Originally, I thought I’d create my own artwork for the cover. Ever since I was a kid dreaming of writing a book, I also dreamt of illustrating that book. I had an idea for a tessellation image of a man, where one stood out as different than the rest (not unlike my story).
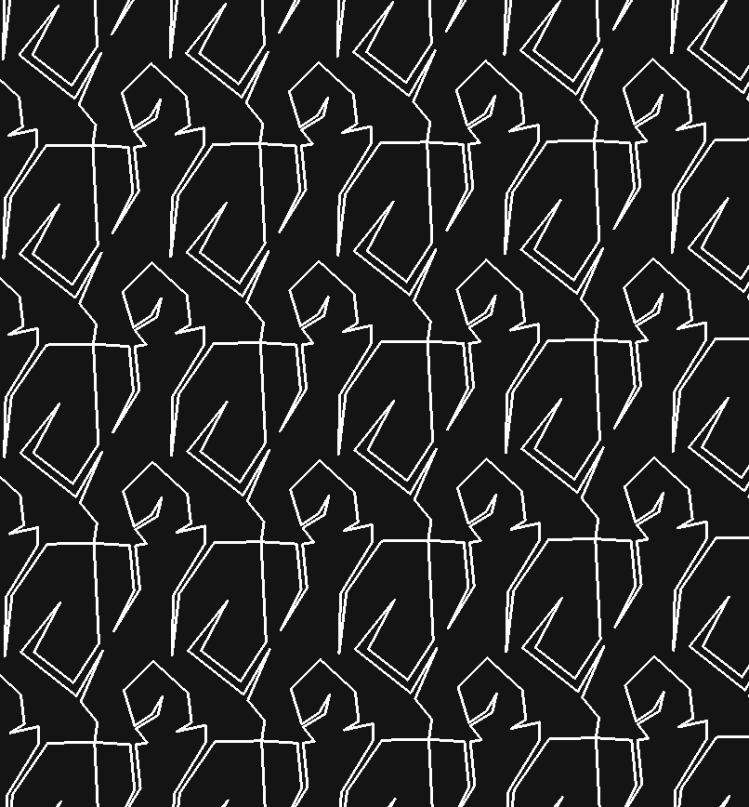
Not bad for a first run, so I spent a considerable amount of time enhancing it. I personally really like gimp for editing images, so I used it for most of my image manipulation here.
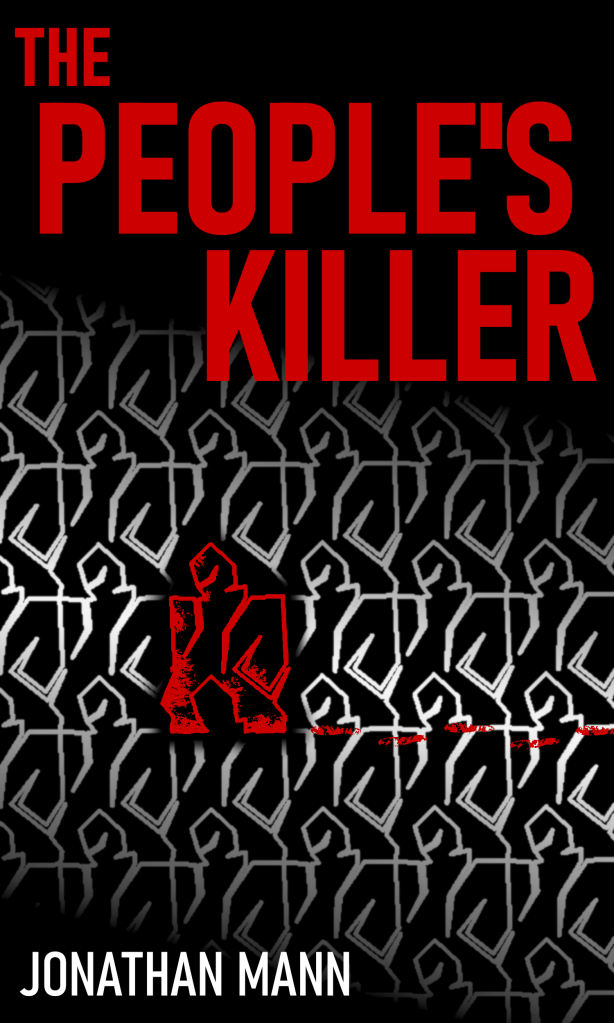
I really liked the result, and it has kind of an old-school thriller book cover feel, but I didn’t feel like it was quite professional enough.
Plan B:
I looked at fiverr.com to see if someone could put together a cover design that was professional and cheap. There were tons, and the delivery time was suspiciously fast. Obviously they weren’t creating original art so quick for so cheap, and I was leery about where the images were coming from, so I looked elsewhere (don’t want an angry artist writing me emails, or worse, suing me).
I found a site that made fantastic-looking covers. They only use each design once, to help ensure you don’t see your cover on another book, but they licensed the images that they started with in such a way that someone else could still end up with the same starting artwork on their book cover. In the site’s fine print they mentioned ShutterStock.com, so I went there to check them out.
It turns out ShutterStock.com is a great site full of wonderful art and photos (and more), that you can license to use commercially. I figured I could create my own cover if I had a solid image to start with. I sifted through their available royalty-free art and photos, and found a good starting image. I then purchased a license package (I believe the cheapest was 2 images for $30), and downloaded the highest-quality copy I could.

So far so good. I adored the artwork, and it fit pretty well with my story and the overall vibe I was going for. One thing I’ve been conscious of through the design process was that I wanted the final cover to look really solid small, and black and white. This is to ensure that it looks appealing even on a Kindle device. To that end, I was messing with the colors, and found that cranking up the color and darkening the darks to an inky black really made the image pop. Also, the figure in the original image has long hair (which didn’t fit with my story!), so I edited it out.
Next, I rebuilt my Title and Author text from my first cover effort. Amazon is pretty picky about their uploaded image sizes, dpi, and file size, so it took several tries to get the paperback version and the Kindle version just right. Notice that for the paperback version, I darkened the back cover section a bit and edited out a few of the bright police lights to make the back cover text stand out as much as possible.
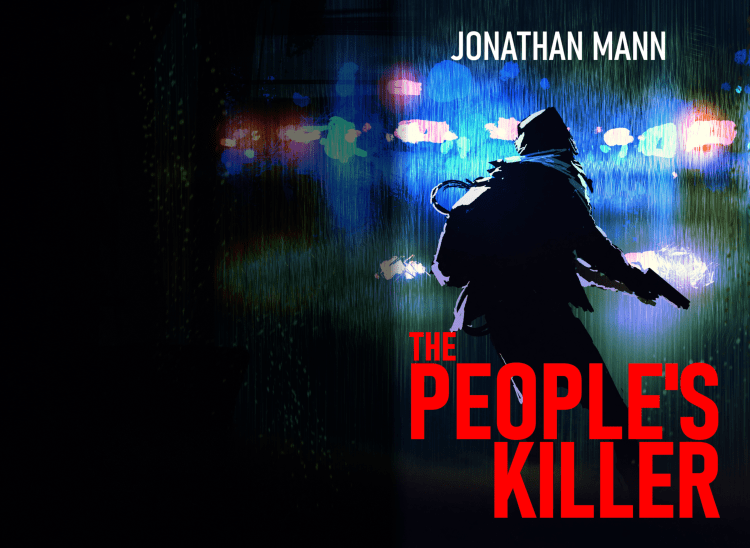
This process looks straightforward and simple here, but I spent copious hours getting it just right. One of my favorite things about writing for myself and designing my own book covers, is that it allows me give in completely to my perfectionism. I don’t have a deadline, I don’t have a boss, I can take as long as I want, and completely exhaust myself making my end product align exactly with my vision.
